QR Review (Manual Intake Setup)
Table of Contents
Overview
To begin a new BIA audit an intake form must first be created by the QR in the Intake Form Setup page.
Steps to set up an Intake Form
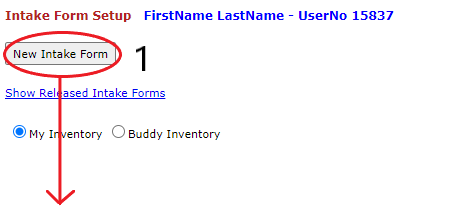
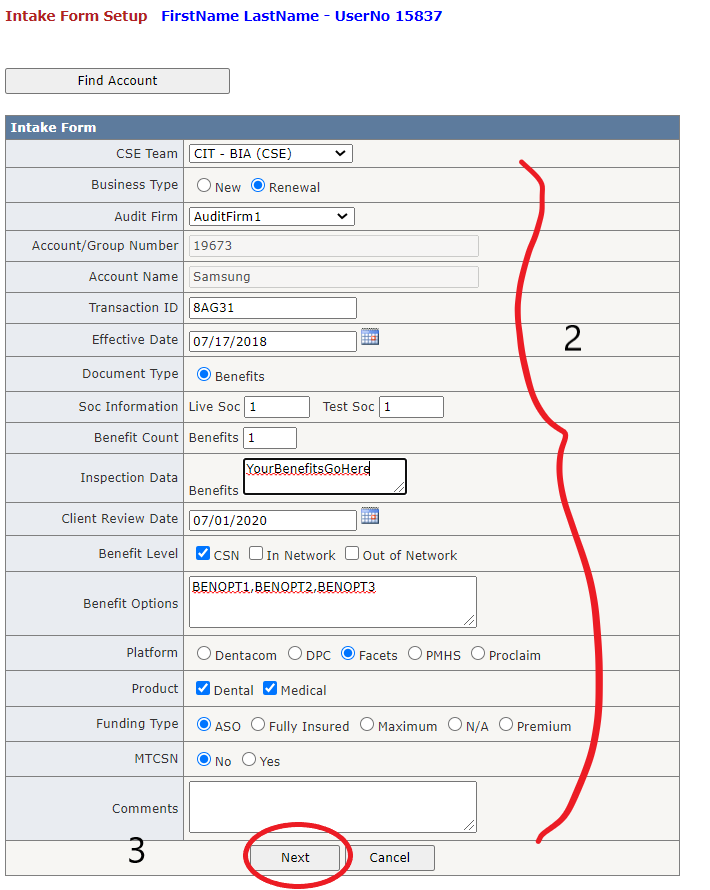
Complete the main intake form by clicking the "New Intake Form" button from the home page. The QR can then enter account information manually or by using the built-in Vista account search feature by clicking the "Find Account" button. Once the requsite information is entered, the QR can click the "Next" button to continue the intake form set up.
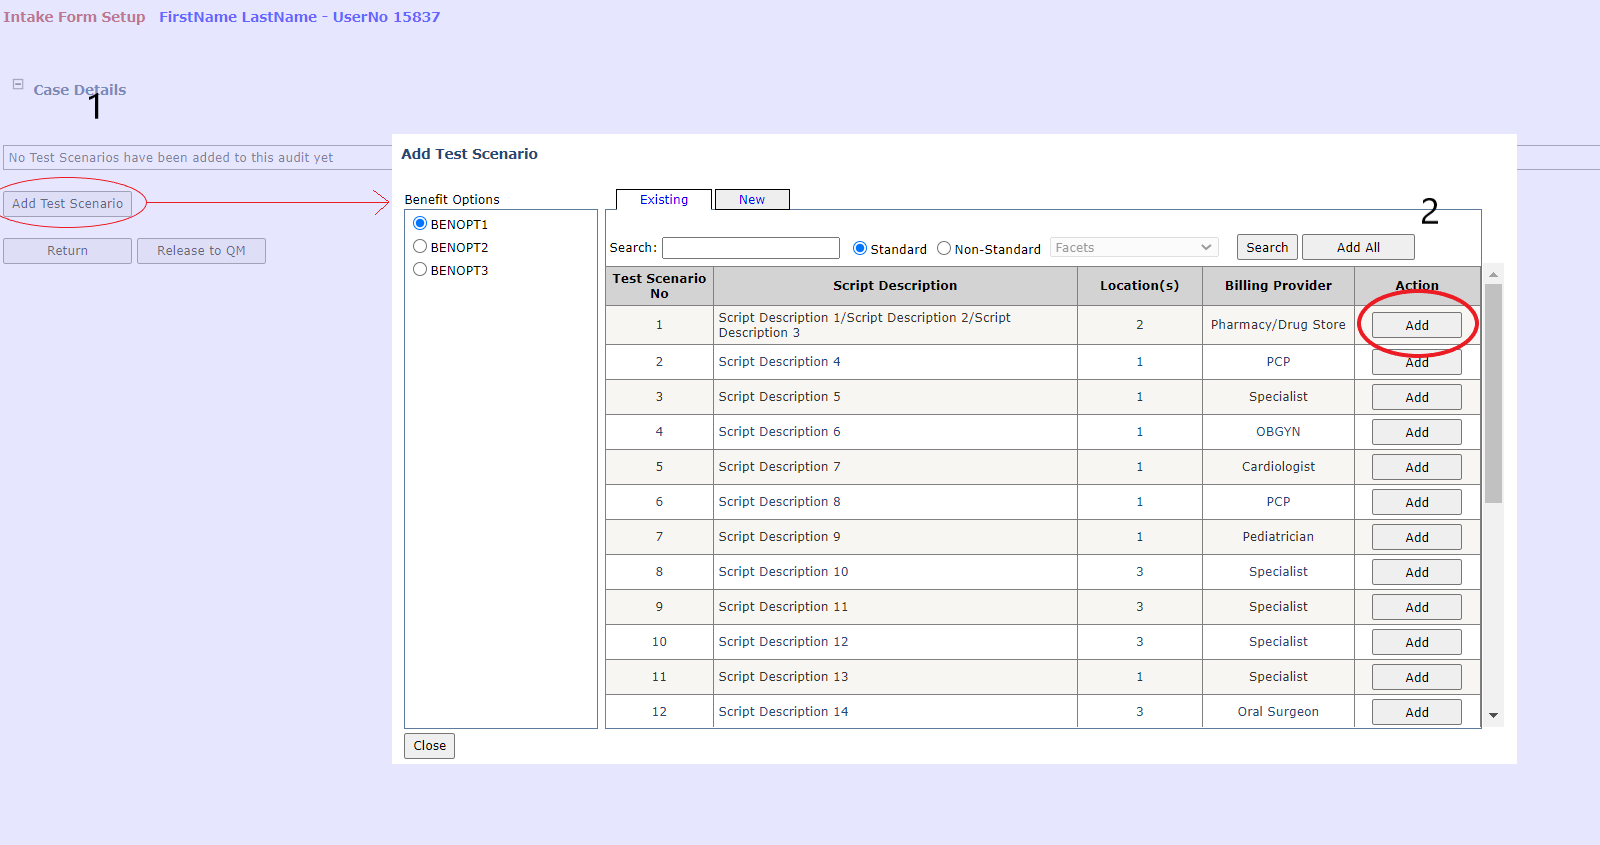
Add or remove test scenarios to any number of benefit options added to the audit in step one by clicking the "Add Test Scenario" button. A popup will appear with a list of all test scenarios for the platform selected by the QR in step one. Should the QR need to add a test scenario that is not listed, they can navigate to the "New" tab in the popup and create an "ad-hoc" test scenario.
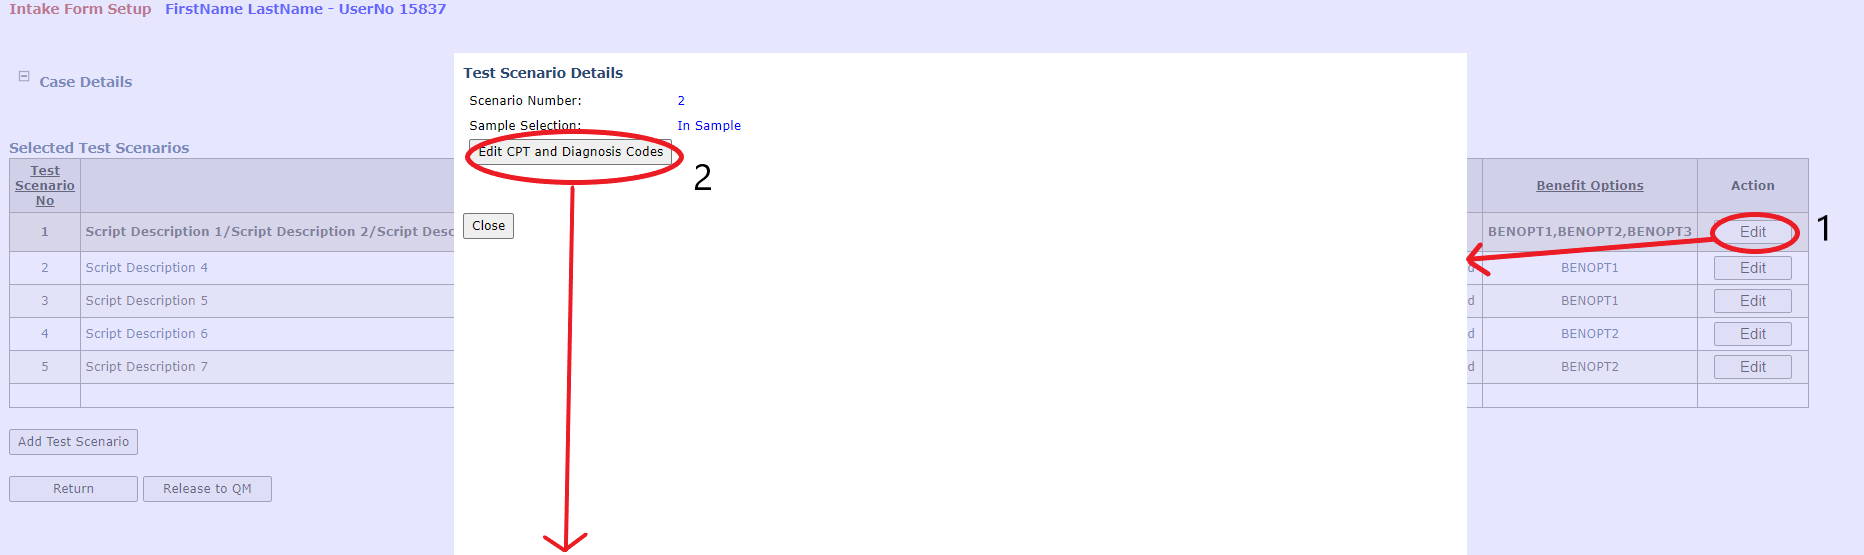
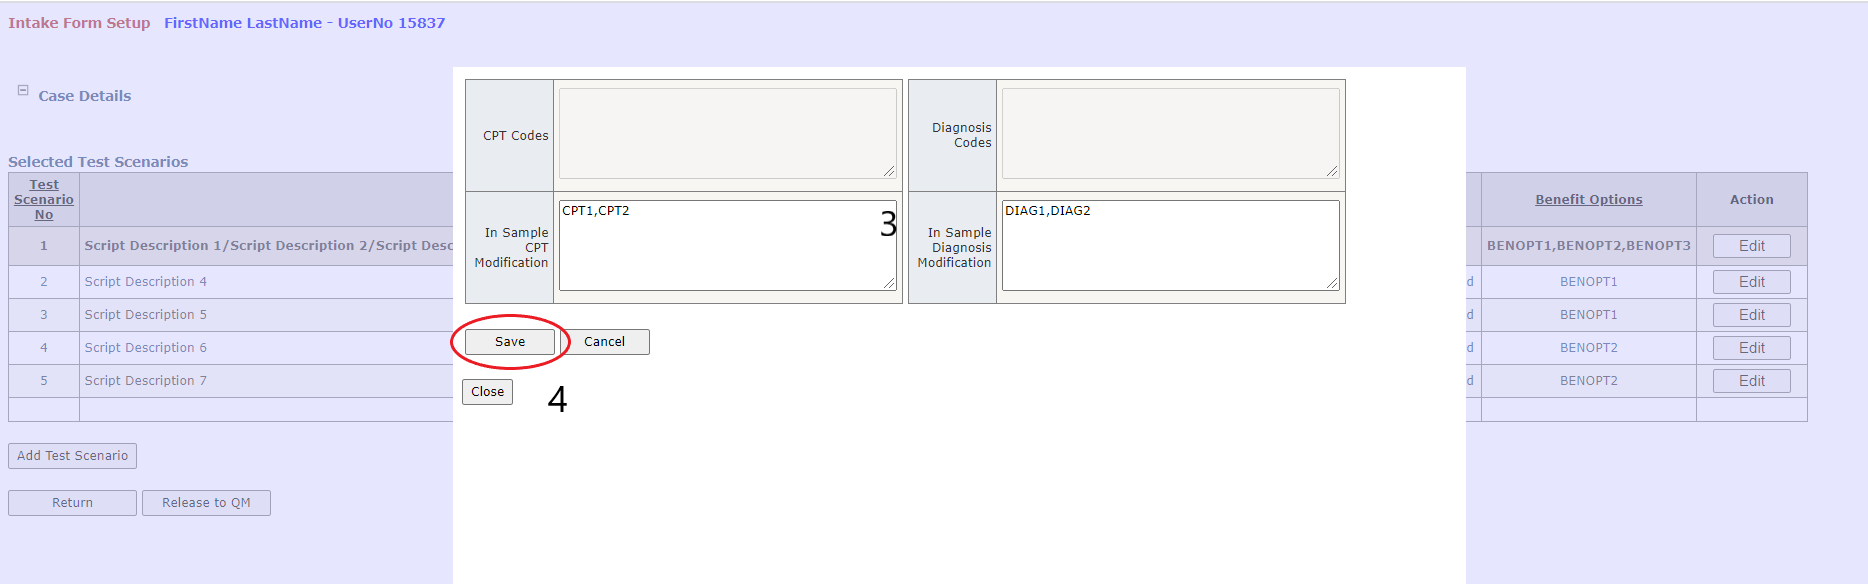
Add or remove CPT and diagnosis codes to any number of selected test scenarios using the "Edit" row button. All codes entered must be comma delimited.
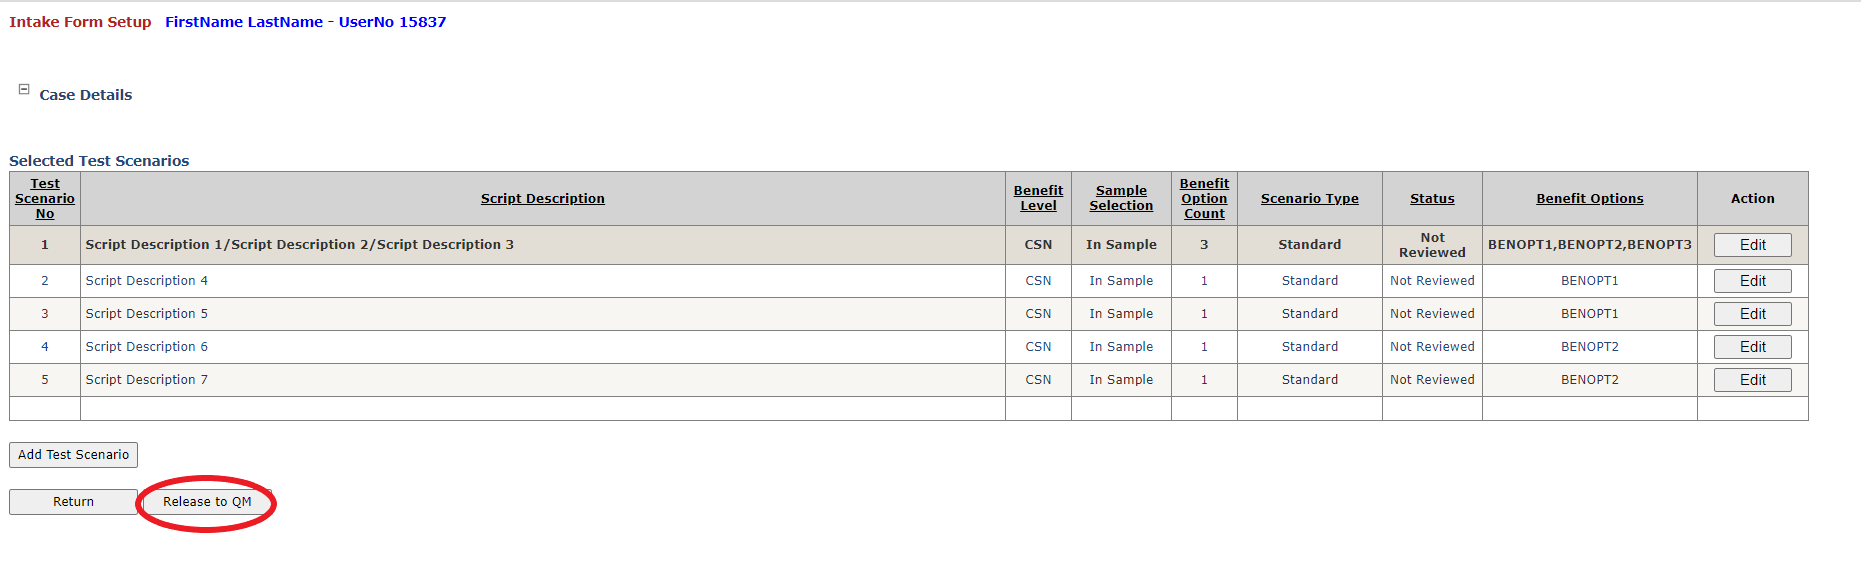
Release the intake to the QM using the button at the bottom of the page, or by navigating to the main page with the "Back" button and selecting the button in the corresponding row.
Other Features
- The QM can view buddy inventory by selecting the "Buddy Inventory" radio button on the main page.
- Intake forms not yet released to the QM can be edited by clicking the "Edit" button in the intake's corresponding row in the table on the main page. From here, the user must maximize the "Case Details", and click on any of the four "Edit" links. All fields are editable in this stage of the audit, however, changing the platform will delete all previously added test scenarios, including ad-hocs which will have to be manually re-entered if still required. Similarly, removing a benefit option will delete all test scenarios tied to that benefit option. So if BENOPT3 is tied to scenario A, and scenario A is not on any other benefit option, deleting BENOPT3 will also remove scenario A from the audit.
- The QM has the option to view intakes already released to the QM by clicking the "Show Released Intake Forms" link button on the main page. Released intake forms cannot be deleted and are view only. Released intakes are only shown in this table until a QM assigns a CSE to the audit. This option is also available for buddy inventory.
Relevant Files
SQL
Tables
- smart.bia_IntakeForm.sql
Stored Procedures
- smart.bia_Get_ReviewRecord.sql
- smart.bia_Read_IntakeForm.sql
C
Main Page
- bia_IntakeForm.aspx
User Controls
- bia_uc_IntakeFormNew.ascx
- bia_uc_IntakeFormEdit.ascx
- bia_uc_CaseDetails.ascx
- bia_uc_TestScenarioList.ascx
Demo
Complete the Main Intake Form
Add or Remove Test Scenarios
Add or Remove CPT and Diagnosis Codes
Release the Intake to the QM