QR Review
Table of Contents
- Overview
- Button Legend
- Tabs
- Add Errors
- Acknowledge SectionList
- Acknowledge Fieldlist
- Finalize Vs Send BO
Overview
- The QR Review page is where an Auditor can add errors or acknowledge errors and Assign BO Teams per error.
Button Legend
Note: Colored squares are not buttons in Group CheckList & Section List gridviews.*
Green: Reviewed / Acknowledged
- Field list plan has been reviewed by the auditor, no error has been charged.
- Red: Open
- Field list plan has not been reviewed yet or is still undergoing review.
- Yellow: Errors
- Error(s) have been charged to field list plan.
Tabs
- Checklist Setup
- See [Checklist Setup]
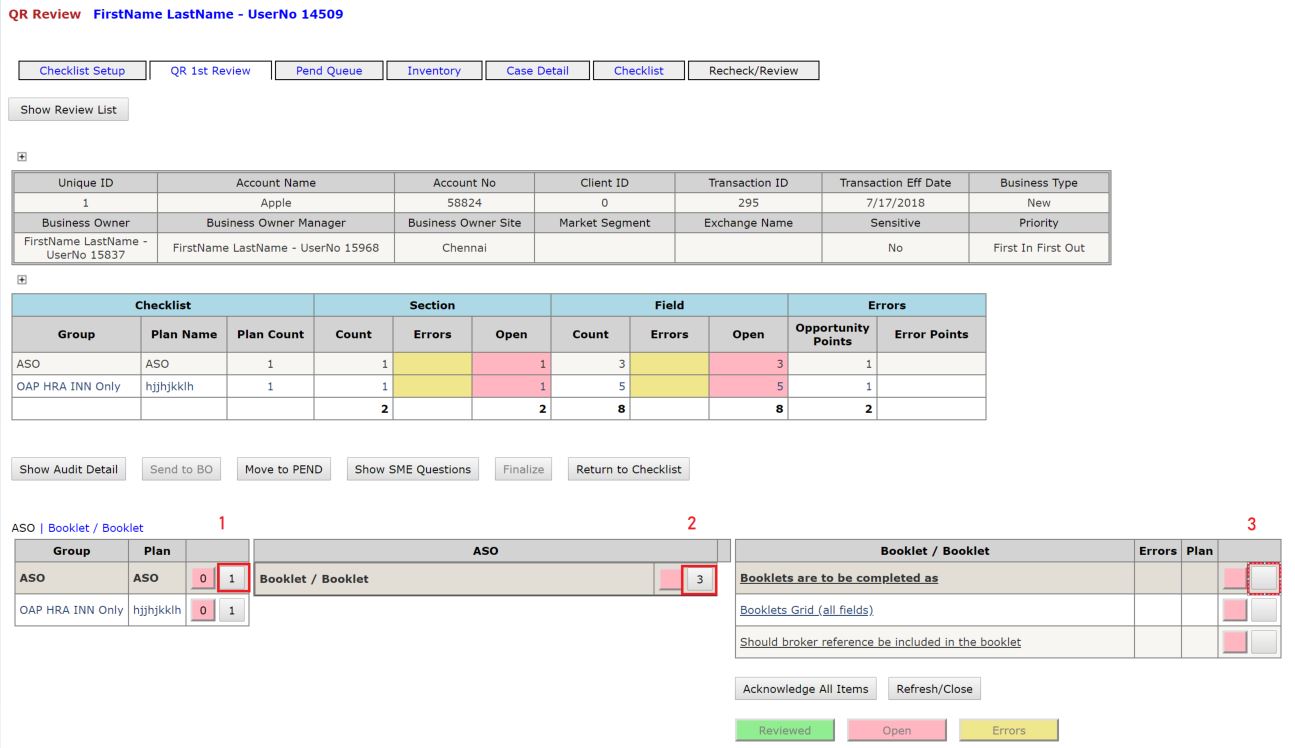
- QR 1st Review
- Auditor can see overview of Field Lists, charge errors, see audit details, ask SME question, Pend, and Return to Checklist.
- BO can choose Agree, Disagree, or On Hold. (More details in BO Review Flow)
- Pend Queue
- See [Pend Intake Form]
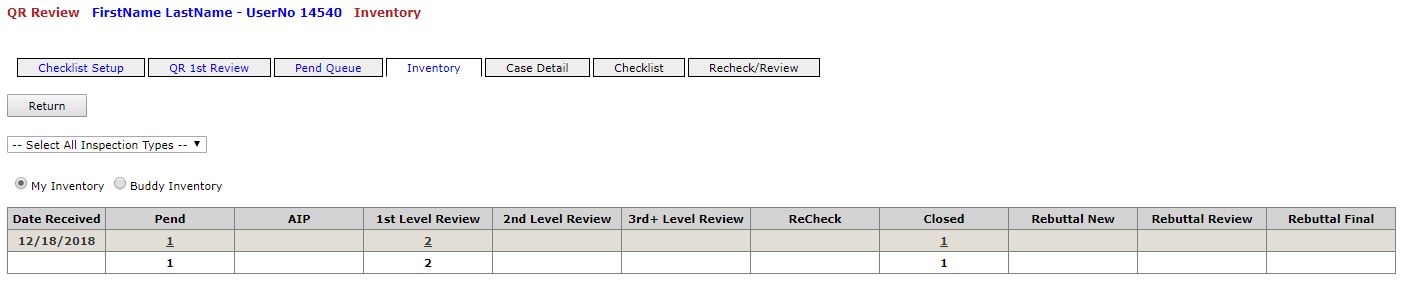
- Inventory
- An Auditor is responsible for Pend, AIP, Recheck columns. They can see the flow of their intake forms.
- QR can see all Inventory by default "-- Select All Samples --" or can filter by single Sample to only that selected Sample's inventory. [Inventory Menu]
- Case Detail
- An auditor can EDIT ONLY in any of the detail views in this section
- Intake Form
- When a BO or QM first create an audit intake form, the information that is first entered can be found in this details view
- Account Information
- Information about the account's effective date, market segment, sales market, FSO, buyer group.
- Contact Information
- Point of contacts including directors, managers, sales.
- Indicators
- Critical indicators that may apply to the audit.
- Checklist
- QR can see which Field Level Checklist have been selected.
- Recheck/Review
- See [QR ReCheck]
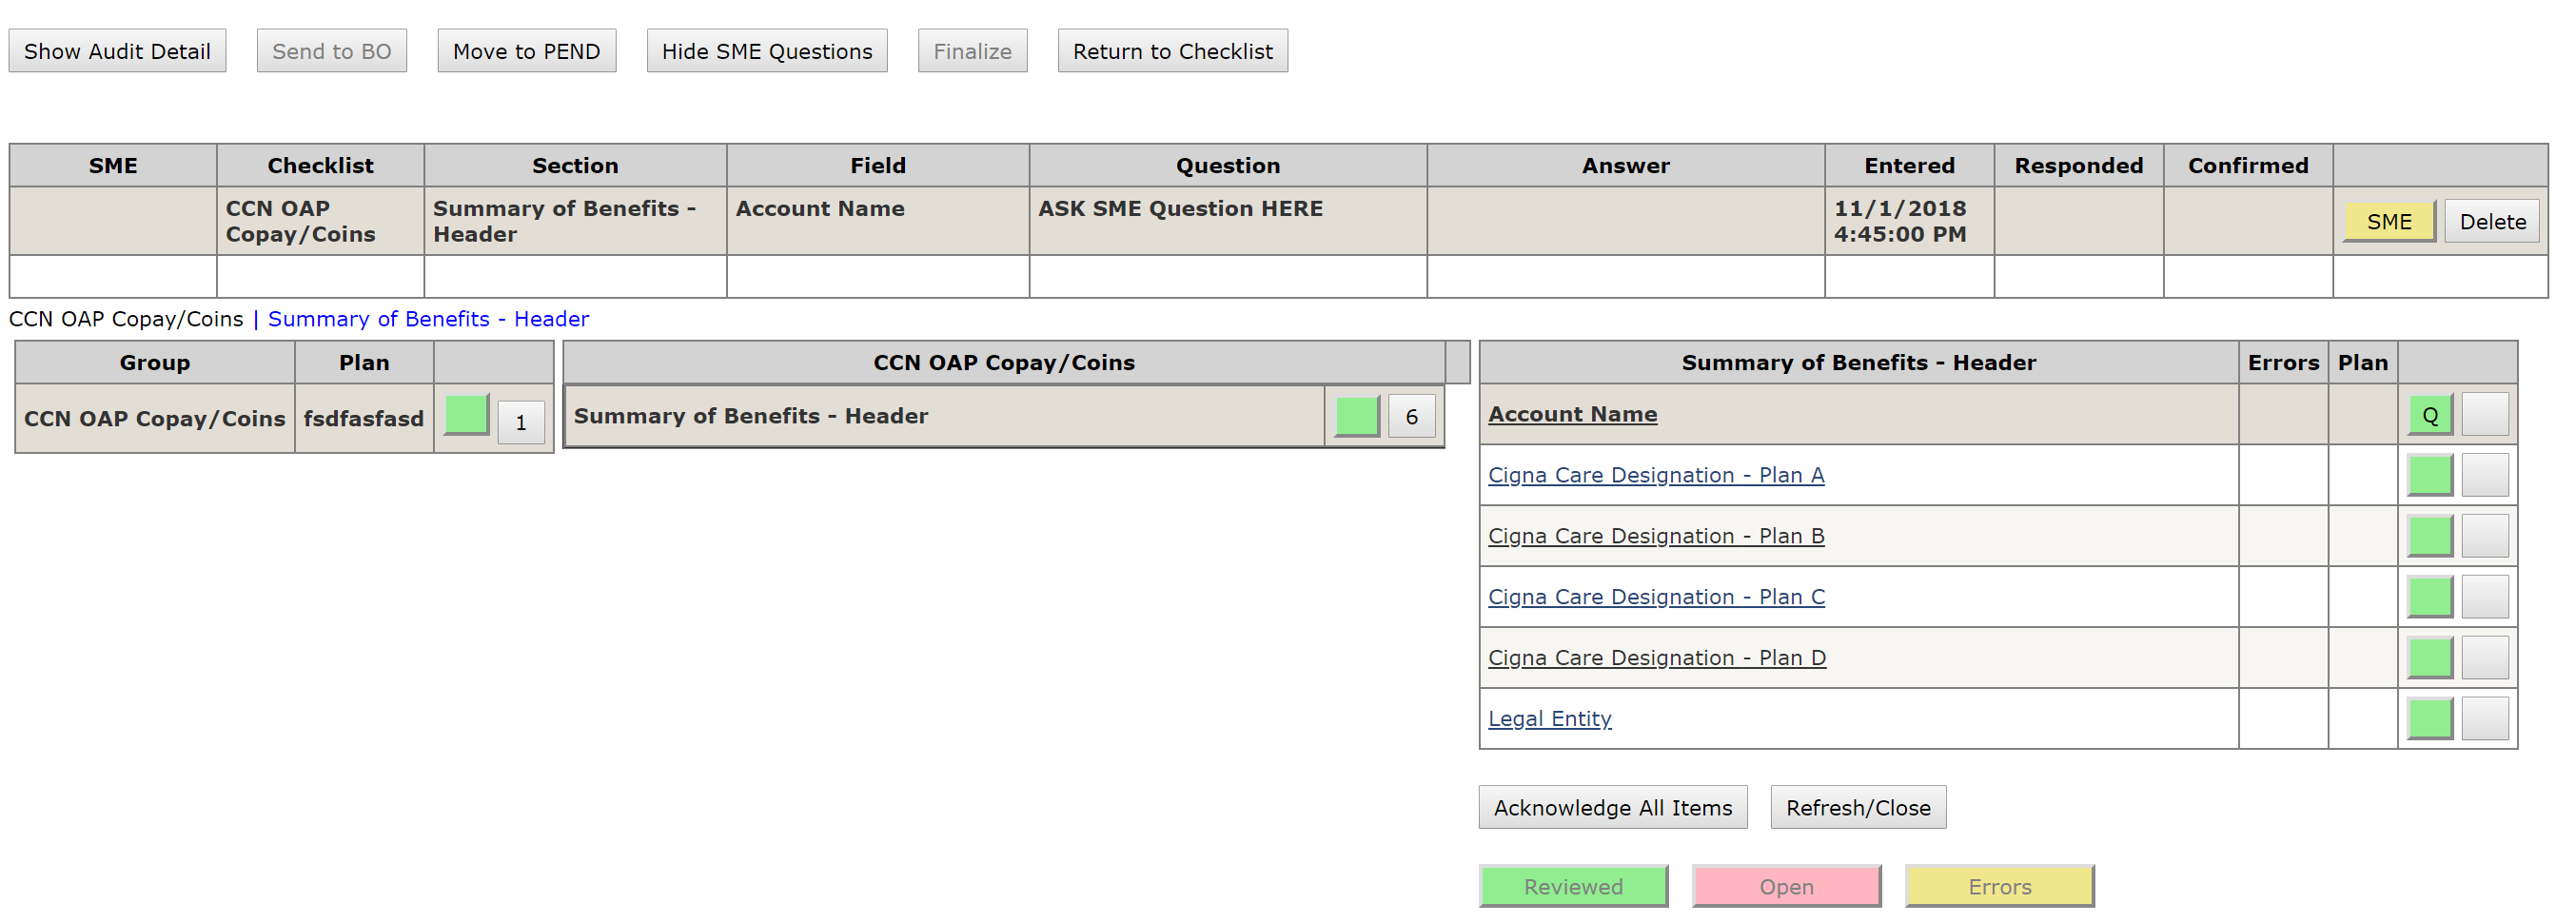
Add Errors
In "QR 1st Review" Tab:
uc_Checklist - dgv_Summary:
- Checklist
- Group - name of Checklist, selected from the dropdown in Checklist Setup Tab
- Plan Name - name of plans listed, comma separated
- Plan Count - count of plan names comma separated
- Section
- Count - Number of sections in Checklist(s)
- Errors - Max number of section error. (Counts as 1 per Section)
- Open - Number of Sections that have 0 Fields that have been either charged with an error or acknowledged
- Field
- Count - number of fields from sections added together
- Errors - Total number of errors at the field level
- Open - Total number of Fields that have not been either charged with an error or acknowledged
Errors
- Opportunity Points - number of plans for each section added together
- Error Points - number of plans with errors for each section added together
Click on square button next to red square on Checklist Level
- Click on square button next to red square on Section
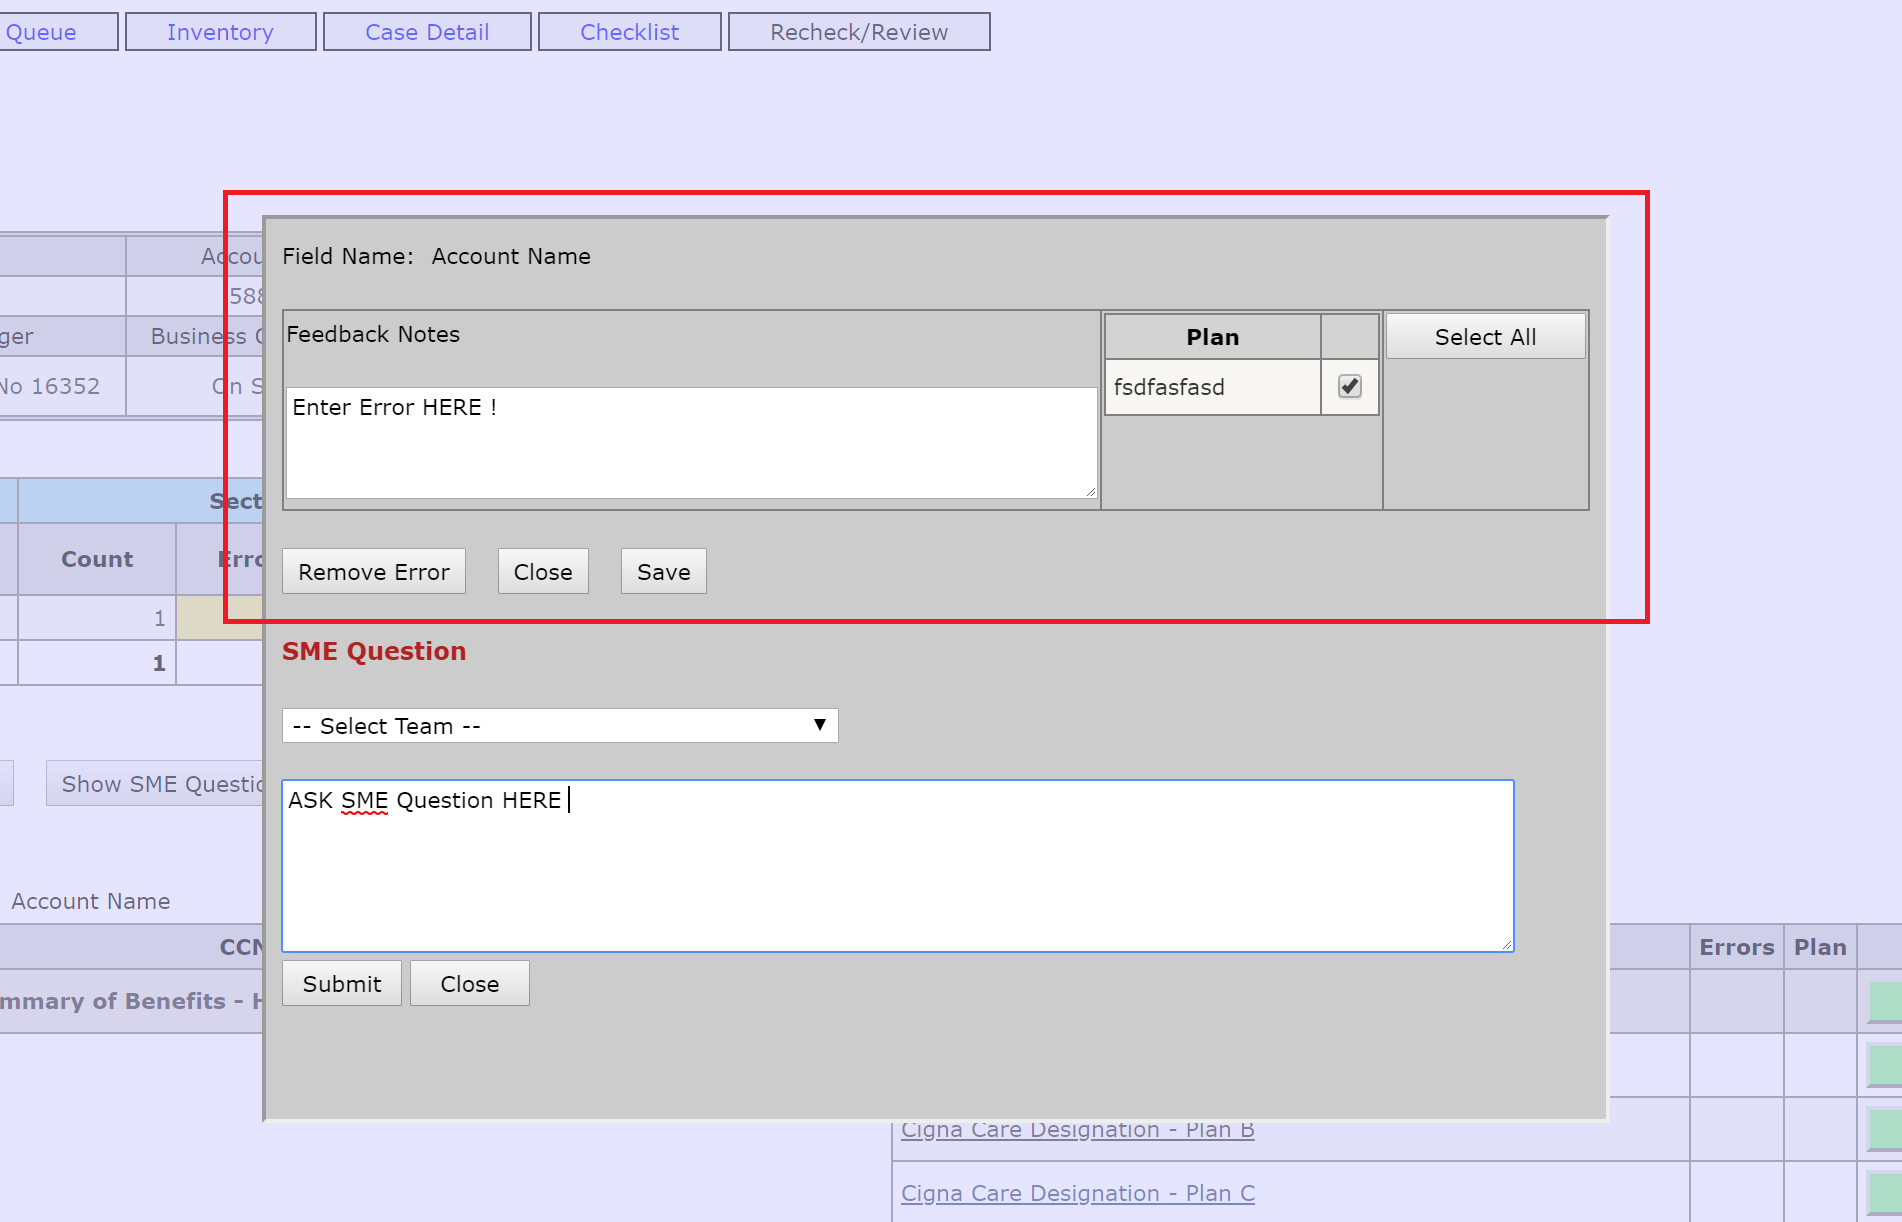
- Click on square button next to red square on field list (pop up will display)
- From the pop up - Add an error, then click "Save" button
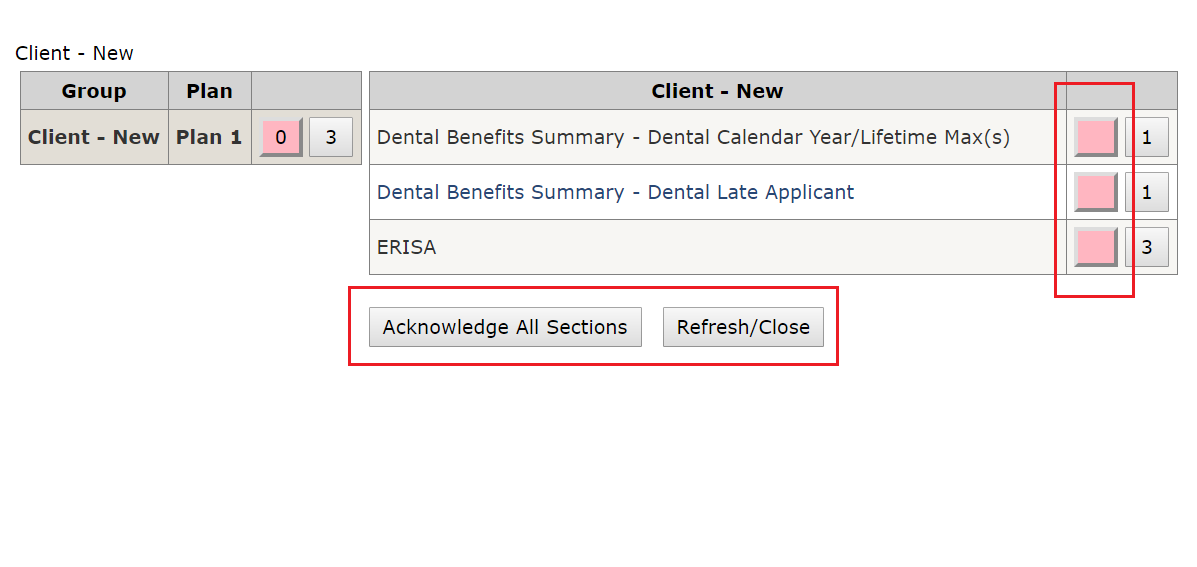
Acknowledge SectionList
- Click on red square on section list(s) to select individual sectionlists
- Click on "Acknowledge All Items" - acknowledges all fieldlists from the sectionlists without having to go into each section manually.
Acknowledge FieldList
Acknowledging a fieldlist can be done one of two ways.
- Click on red square on field list(s) to select individual fieldlists.
- Click on "Acknowledge All Items"
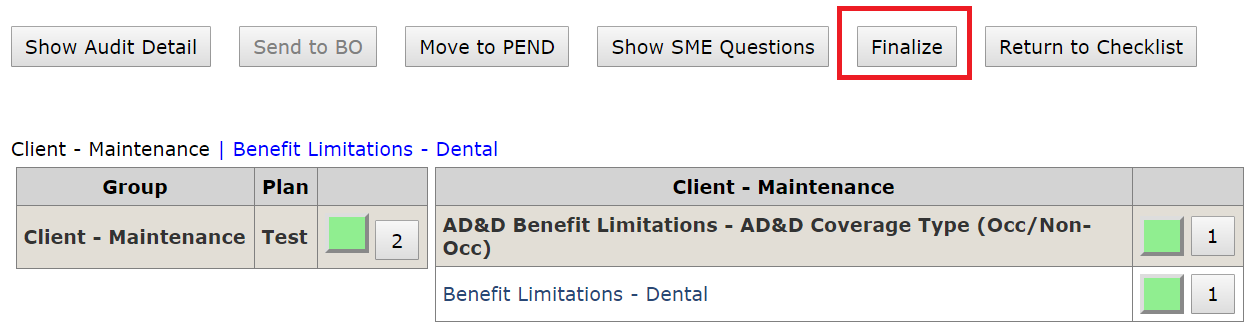
Finalize Vs Send BO
How to finalize an audit:
An intake form audit can be finalized without having to go to the BO,
If there are no errors charged and no SME questions asked and awaiting response.
In order to Finalize, No errors should be charged
- Select button Acknowledge All Items. Finalize button should Enable.
- NOTE: Errors with SME questions will show Q and Finalize button will be disabled if there are any active SME questions.
How to Send to BO:
- If a QR charges at least 1 error to a fieldlist and all SME questions have been confirmed, QR can "Send to BO"
Inventory Menu
Back to [Tabs]
FieldList Error
Back to [Add Errors]
QR Error PopUp
Back to [Add Errors]
Acknowledge All Sections
Back to [Acknowledge SectionList]
Acknowledge All Fields
Back to [Acknowledge FieldList]

QR Finalize
Back to [Finalize Vs Send BO ]
No Errors
Back to [Finalize Vs Send BO ]
Send To BO
Back to [Finalize Vs Send BO ]
