QR Review
Table of Contents
- Overview
- Button Legend
- Tabs
- Add Errors
- Acknowledge SectionList
- Acknowledge Fieldlist
- Finalize Vs Send to IM/CSE Review
Overview
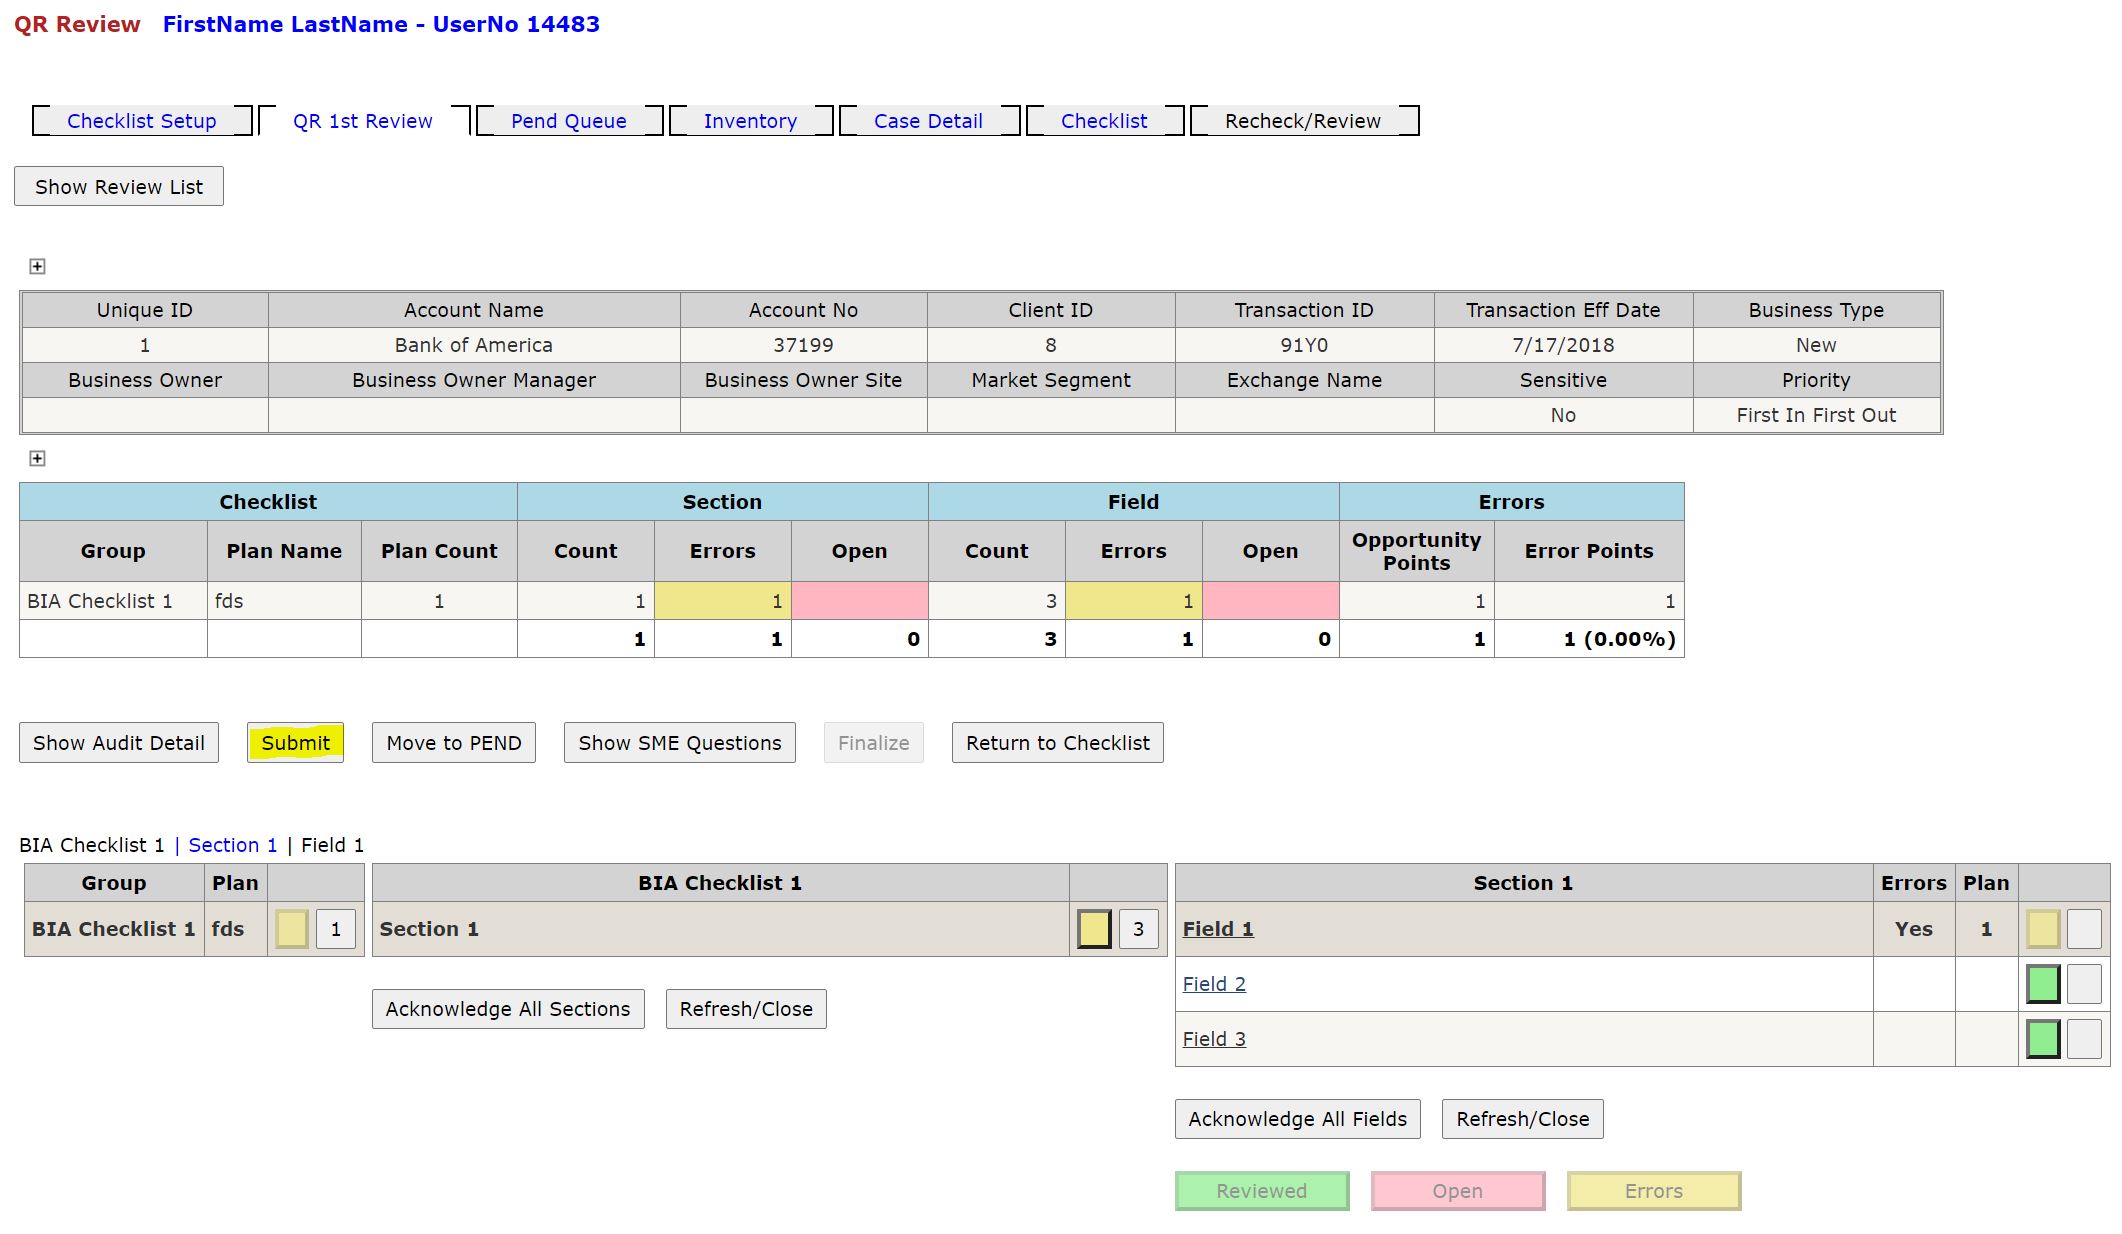
The QR Review page is where an Auditor adds errors/acknowledgments for the field lists of the intake form.
Button Legend
Note: Colored squares are not buttons in Group CheckList & Section List gridviews.*
Green: Reviewed / Acknowledged
- Field list plan has been reviewed by the auditor, no error has been charged.
- Red: Open
- Field list plan has not been reviewed yet or is still undergoing review.
- Yellow: Errors
- Error(s) have been charged to field list plan.
Tabs
- Checklist Setup
- Auditor can use, Sample Group, Function Type, and Sample drop downs and Click "Get Next" to pull audits that are assigned to them.
- See [Checklist Setup]
- QR 1st Review
- Auditor can see overview of Field Lists, charge errors and assign BO Teams to an error, see audit details, ask SME question, Pend, and Return to Checklist.
- Pend Queue
- See [Pend Intake Form]
- Inventory
- An Auditor is responsible for Pend, AIP, Recheck columns. They can see the flow of their intake forms.
- QR can see all Inventory by default or can filter by a Sample Group, Function Type, and Sample.
- QR can select Buddy Inventory radio button to view and work on audits assigned to Buddies. [Inventory Menu]
- Case Detail
- An auditor can EDIT ONLY in any of the detail views in this section
- Intake Form
- When a Gate Keeper first creates an audit intake form, the information that is first entered can be found in this details view
- Account Information
- Information about the account's effective date, market segment, sales market, FSO, buyer group.
- Contact Information
- Point of contacts including directors, managers, sales.
- Indicators
- Critical indicators that may apply to the audit.
- Checklist
- QR can see which Field Level Checklist have been selected.
- Recheck/Review
- See [QR ReCheck]
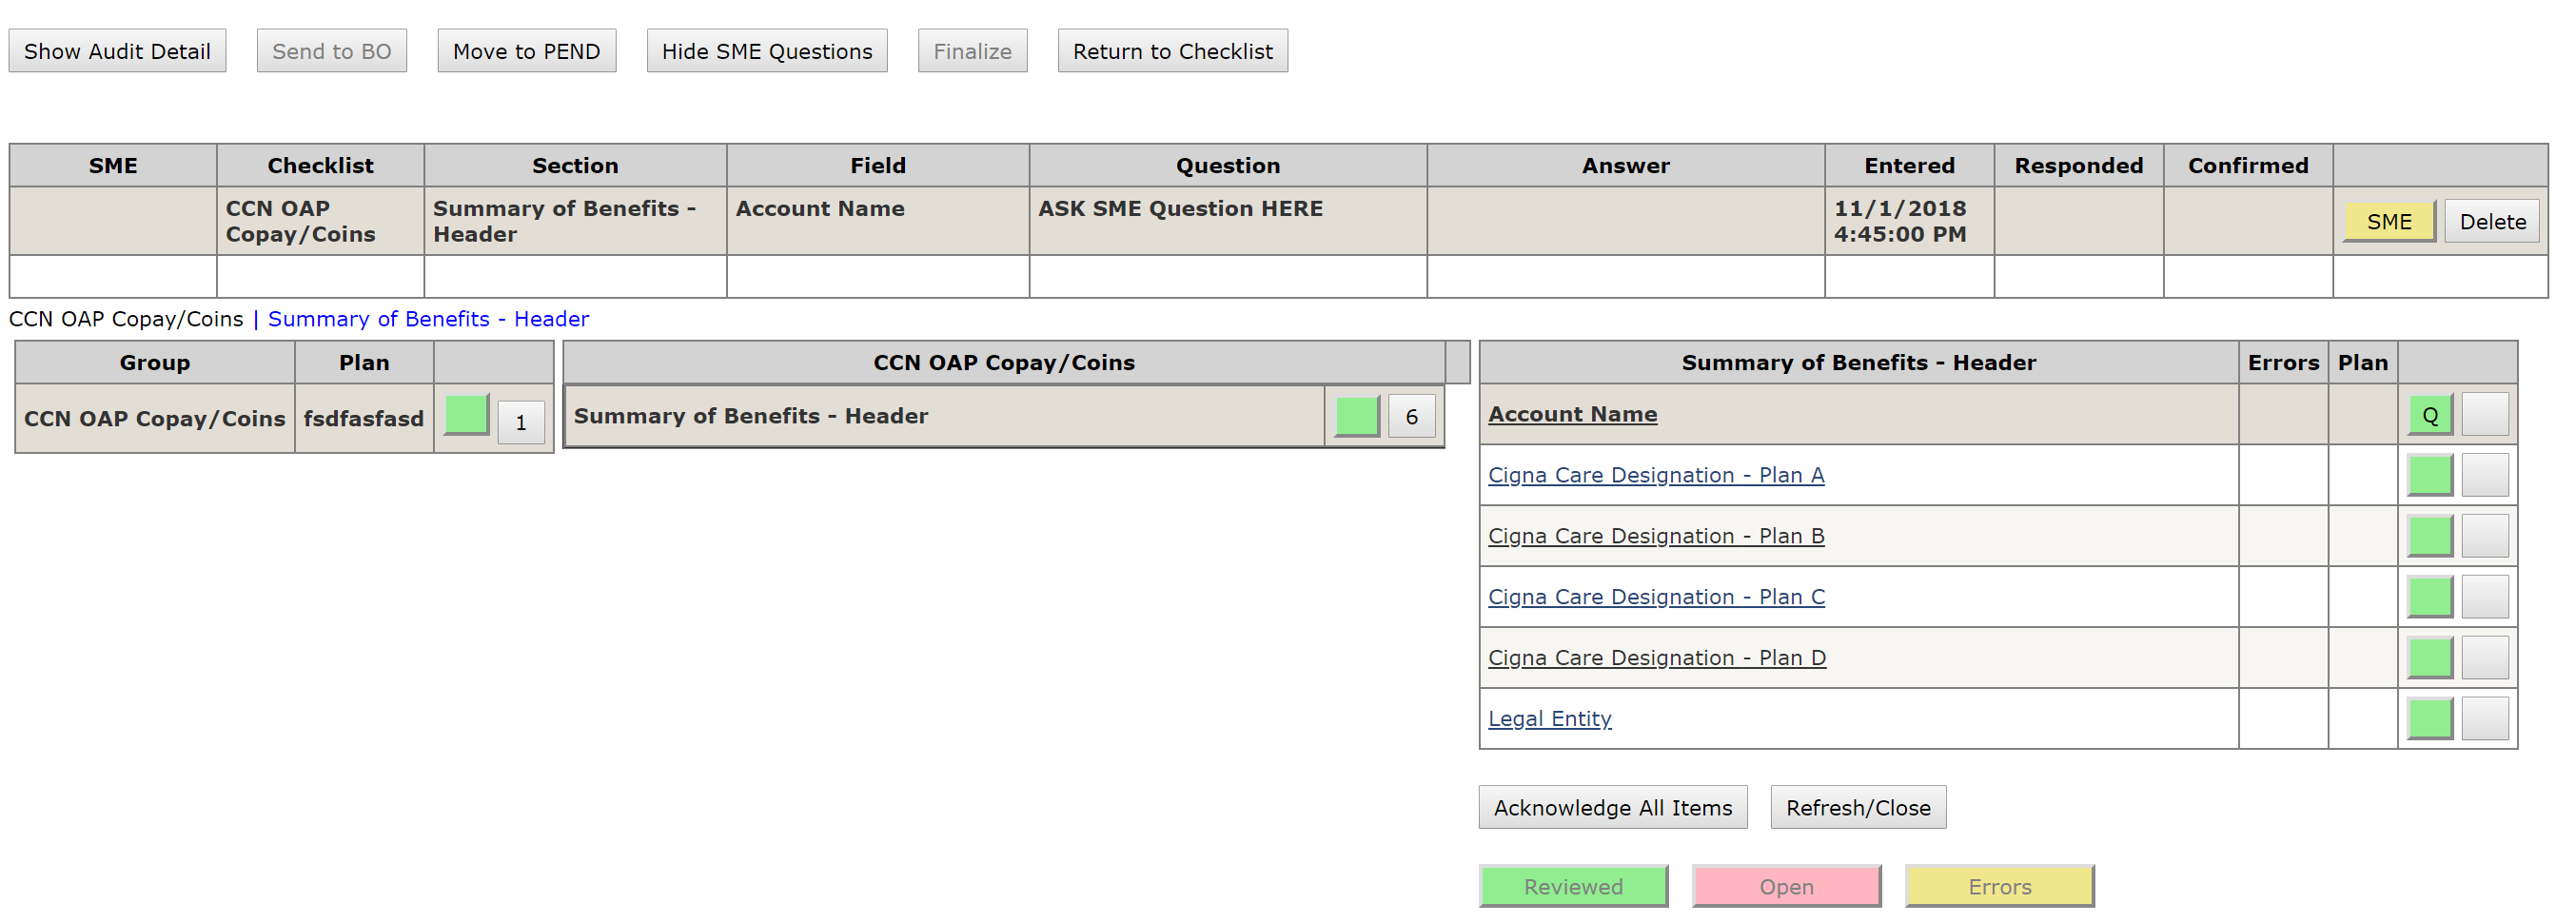
Add Errors
In "QR 1st Review" Tab:
uc_Checklist - dgv_Summary:
- Checklist
- Group - name of Checklist, selected from the dropdown in Checklist Setup Tab
- Plan Name - name of plans listed, comma separated
- Plan Count - count of plan names comma separated
- Section
- Count - Number of sections in Checklist(s)
- Errors - Max number of section error. (Counts as 1 per Section)
- Open - Number of Sections that have 0 Fields that have been either charged with an error or acknowledged
- Field
- Count - number of fields from sections added together
- Errors - Total number of errors at the field level
- Open - Total number of Fields that have not been either charged with an error or acknowledged
Errors
- Opportunity Points - number of plans for each section added together
- Error Points - number of plans with errors for each section added together
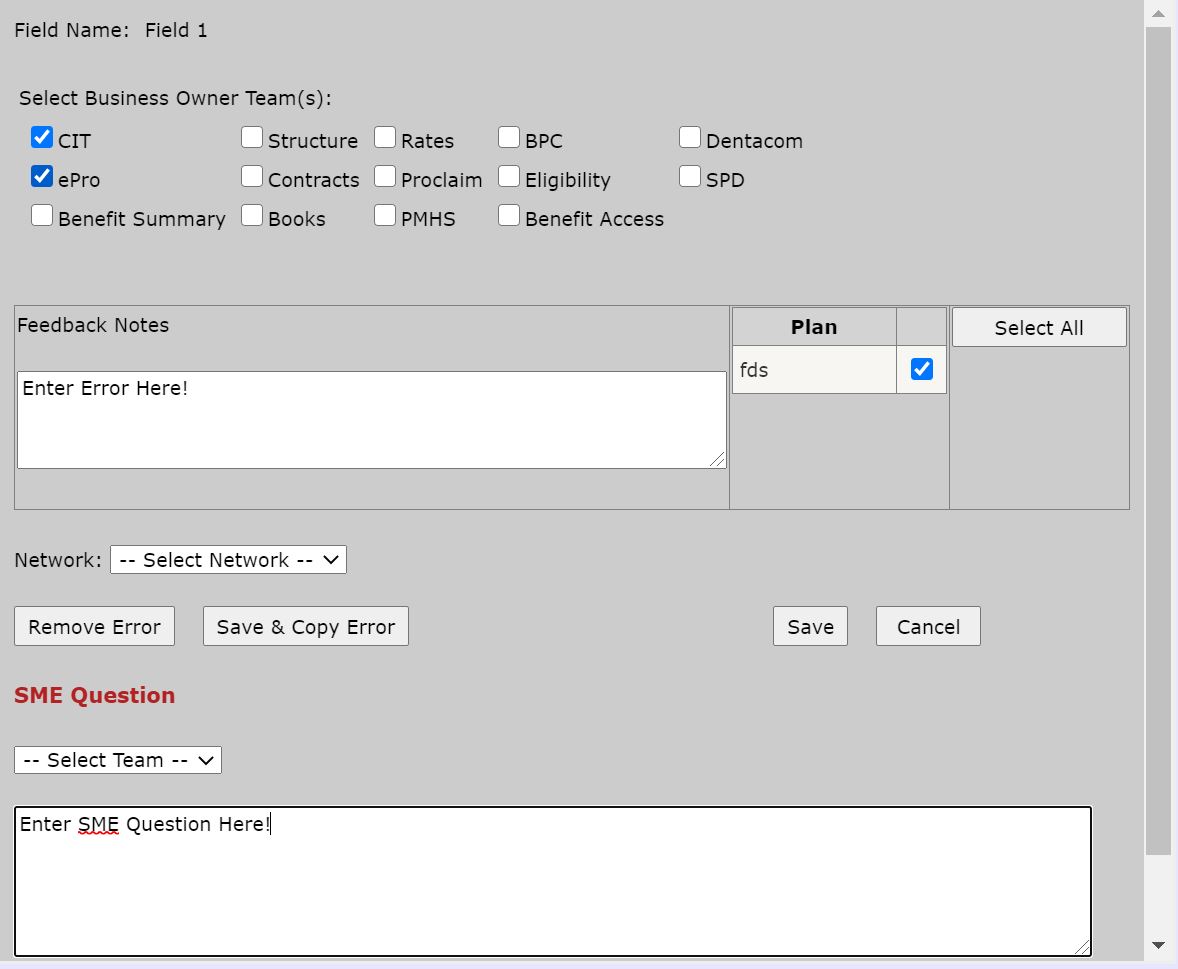
Click on square button next to red square on Checklist Level
- Click on square button next to red square on Section
- Click on square button next to red square on field list (pop up will display)
- From the pop up - Select BO Teams, Add an error and Comments, then click the "Save" button
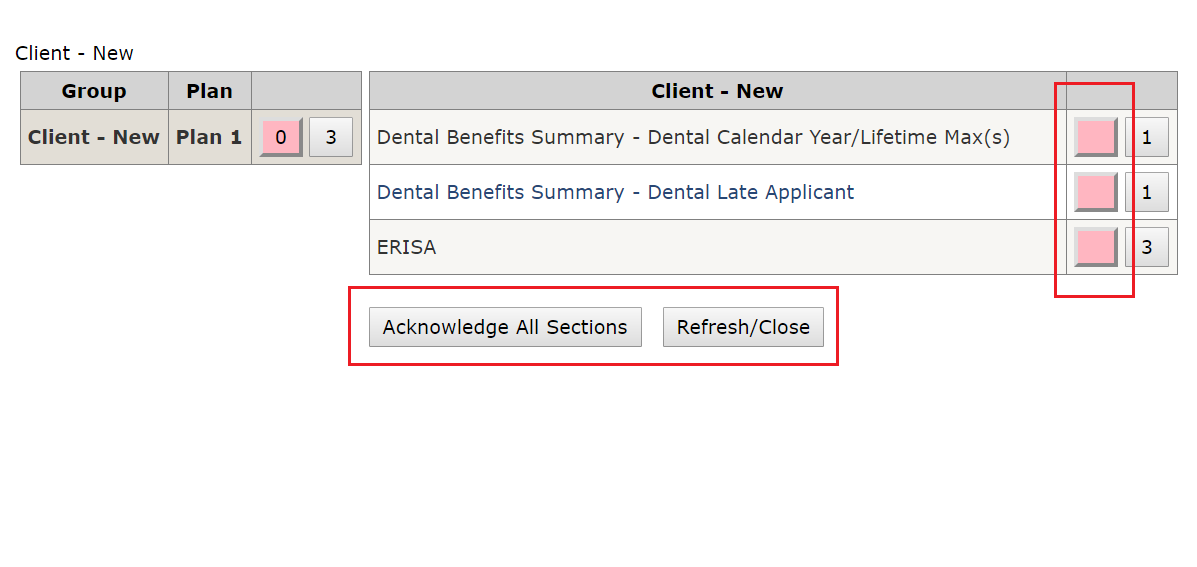
Acknowledge SectionList
- Click on red square on section list(s) to select individual sectionlists
- Click on "Acknowledge All Items" - acknowledges all fieldlists from the sectionlists without having to go into each section manually.
Acknowledge FieldList
Acknowledging a fieldlist can be done one of two ways.
- Click on red square on field list(s) to select individual fieldlists.
- Click on "Acknowledge All Items"
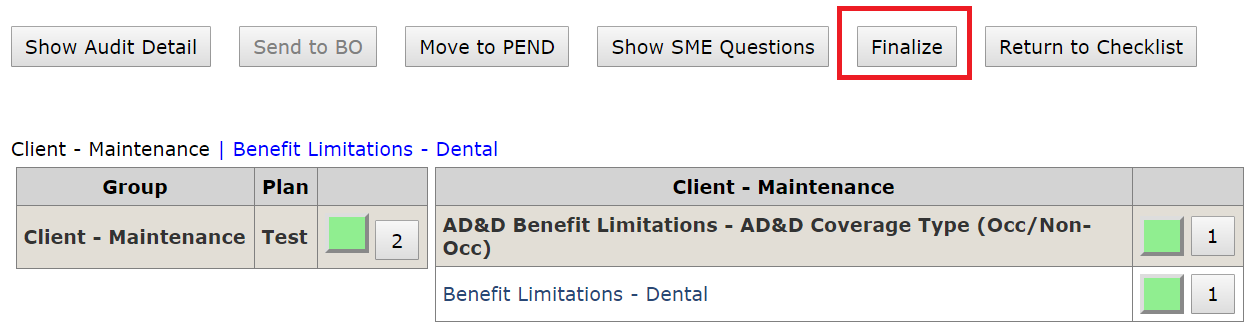
Finalize Vs Send To IM CSE Review
How to finalize an audit:
An intake form audit can be finalized without having to go to the IM/CSE Review,
If there are no errors charged and no SME questions asked and awaiting response.
In order to Finalize, No errors should be charged
- Select button Acknowledge All Items. Finalize button should Enable.
- NOTE: Errors with SME questions will show Q and Finalize button will be disabled if there are any active SME questions.
How to Send to IM/CSE Review:
- If a QR charges at least 1 error to a fieldlist and all SME questions have been confirmed, QR can send the Intake to IM/CSE Review.
Checklist Setup
Back to [Tabs]

Inventory Menu
Back to [Tabs]

Error Pop Up
Back to [Add Errors]
Acknowledge All Sections
Back to [Acknowledge SectionList]
Acknowledge All Fields
Back to [Acknowledge FieldList]

QR Finalize
Back to [Finalize Vs Send To IM CSE Review ]
No Errors
Back to [Finalize Vs Send To IM CSE Review ]
Send To IM CSE Review
Back to [Finalize Vs Send To IM CSE Review ]