Checklist Setup
Table of Contents
Overview
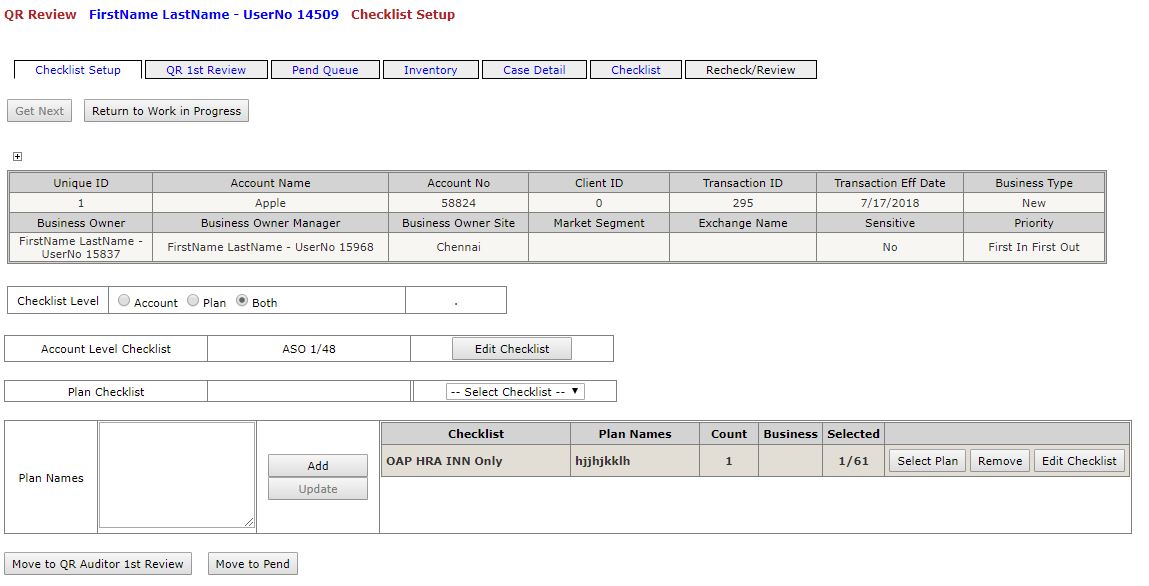
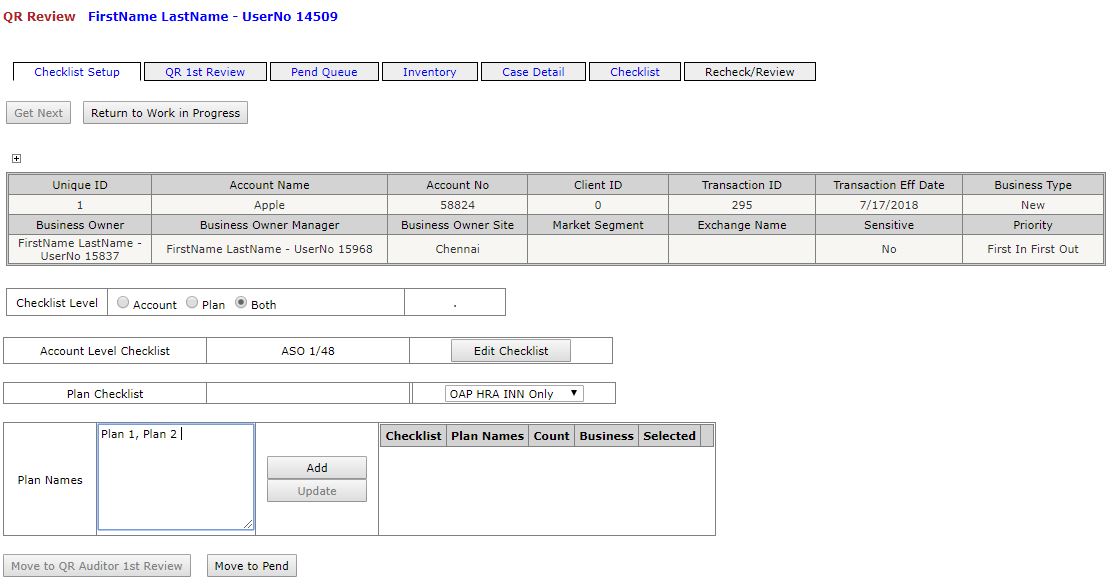
The purpose of the benefits application is allowing the auditing of insurance plans to make sure they have been setup correctly. To do so, checklists are used to make sure all the necessary requirements are fulfilled. The layout of every checklist is identical. A Checklist (p11_Master_Checklist) has sections (p11_SectionList) which has fields (p11_FieldList). During the setup checklist phase of an audit, a QR will go through and select checklists and sections the audit needs to take place against. Depending on the Sample, intake forms can have checklists at the Account Level and/or the Plan Level. For account level checklists, the checklist is already preselected. Only sections need to be chosen from the popup window. To access this window, the Edit Checklist button is pressed in the Account Level Checklist section. The checklist that is selected is set based on the funding type and Sample of the intake form and where the ChecklistLevelNo = 1 from the p11_Master_Checklist. For plan level checklists, the checklist must be chosen from the dropdown. The dropdown is populated with checklists from the p11_Master_Checklist based on Sample, BusinessType, ProductType, and where ChecklistLevelNo = 2. Once a dropdown item is selected, a plan name must be entered into the textbox. When Add is pressed, the checklist has been set.
See [QR Review]
The QR selects an existing intake form in their inventory. If none are already in their inventory, they must click the "Get Next" button to grab a new one. [Get Next Overview]
- Checklist Setup happens in the QR Review page in the first tab, "Checklist Setup", in StageNo 1 after an Intake Form is selected. [Checklist Setup Overview]
- Checklist, Section list, and field list is the order in which you can select.
- Field list is where errors are charged (QR 1st Review)
Two Checklist Levels
- Account
- Plan
- Multiple plan names can be assigned by comma separating each name.
- Example: "Test, ABC, Plan Name 1"
Below image is Sample CIT which gives users the option to select 1 or both Checklist Levels. Some Sample's pre select Checklists.
Sections
- Sections are selected by clicking 'Edit Checklist' button.
- At least 1 section has to be selected from Account Level Checklist and Plan Level Checklist to add a Plan Name. (Note: Some Samples will not show Account Level Checklist.)
- Ability to add multiple Plan Names in this format: Plan Name 1, Plan Name 2, etc [Multiple Plan Names]
- In order to Move to 'QR Auditor 1st Review' Select at least 1 section for Account Level Checklist and each Plan Checklist [Select Plan]
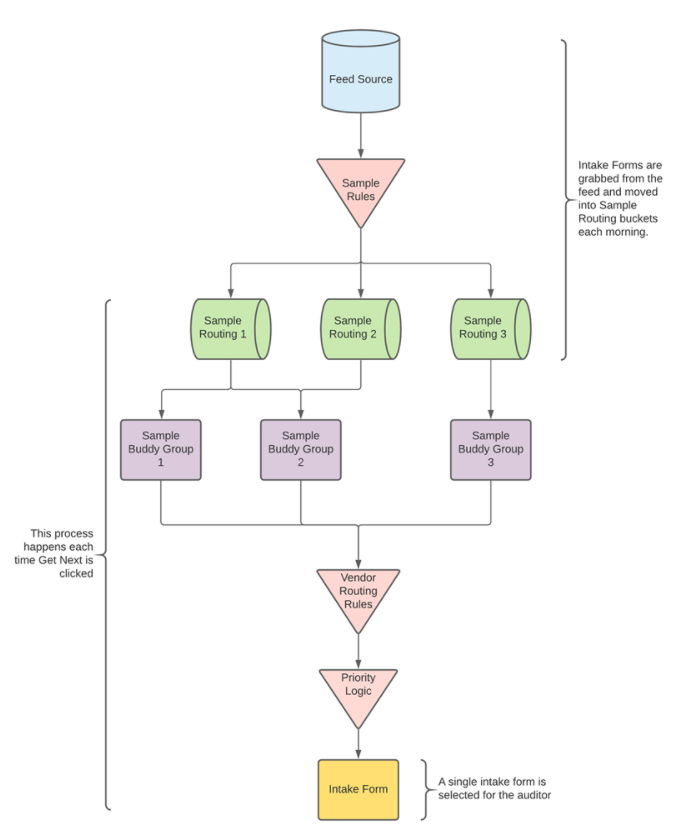
Get Next Overview
Here is an overview of how an intake gets selected when the "Get Next" button is clicked by the QR in the Checklist Setup tab.
- Intake Forms come in from the feed based on Sample Rules into our Sample Routing buckets each morning.
- When "Get Next" is pressed, we look at all intake forms in Sample Routing buckets where the auditor is a member of the Sample Buddy Group.
- Then we take those intake forms and filter them based on Vendor Routing Rules, e.g., OnShore QRs can only pick up Accenture BO work.
- Then we order them based on the Priority Logic, e.g., Escalated or Deferred.
- We then randomly order the highest priority intakes and randomly select one of them for the auditor.
Checklist Setup Overview
Back to [Overview]

Two Checklist Levels
Back to [Two Checklist Levels]
Multiple Plan Names
Back to [Sections]
Select Plan
Back to [Sections]
